However, a lot of users do not know how to make this automatic, from turning on at startup and reducing the fan speed, to increasing the fan speed when things get too hot and reducing it thereafter. This guide is to cover this. With everything properly set, SpeedFan is far better than most fan controllers out there, and, best of all, it's free.
So here we go. Firstly, set SpeedFan to run at startup by placing its shortcut in the Startup folder in the Start Menu.
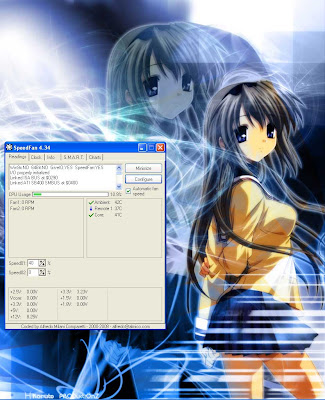
This is what you would see if you run SpeedFan without applying any settings, minus the info messages that you see on first run.
...except the speeds should both be 40% by default, and there will be much more and incomprehensible temperature readings. Depending on your mainboard, many of these will be meaningless, and you will only be interested in Core, Ambient, either one or two of Remote 1/2/3 or 4/5/6/7/8..., and HD0/HD1/HD2...
And actually there is a problem - on some systems, if a temperature of e.g. 127 or -128 (or 0 or 255) degrees celcius is detected by SpeedFan, even if it has no meaning and/or isn't connected to anywhere, the system will shut down in a minute or a few seconds, so act fast to remove the problematic readings.
You see the Speeds, but you're not going to touch them, since they will be automated after SpeedFan is configured. However, you must check Automatic Fan Speed for the speed to change automatically. It's useful to have that option so accessible, since sometimes you'll want the full or no power for overclocking/silent operation.
To configure SpeedFan, click the, erm, Configure button.
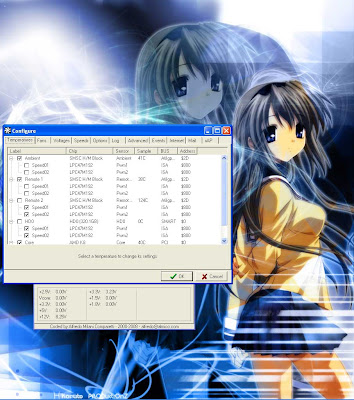
You see various temperatures and their sub-menus, which are Speed01 and Speed02. If you tick a temperature, it shows up on SpeedFan. If you tick the Speed in the sub menu, it means if that temperature is too high it will affect the speed. You can choose one or more or nil temperature to be affecting a certain speed.
When you click on a temperature, you can set the desired and warning temperatures. Plus whether it shows up in the system tray or is logged.
Your fan speeds will be at the minimum value if all related temperatures are below desired, will ramp up to the maximum value when between desired and warning, and go to 100% at warning temperature. Take note of how this works, and choose your temperatures wisely.
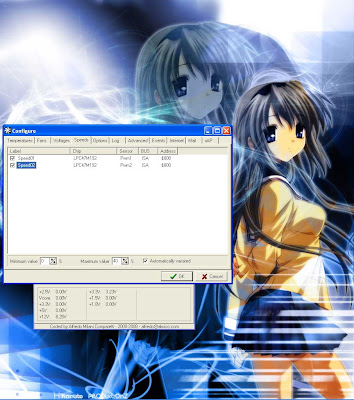
Next tab, Speeds, if you click on a speed, you see the minimum and maximum values they will be at. Plus whether to make it automatically varied.
The use of minimum and maximum values has just been explained earlier.
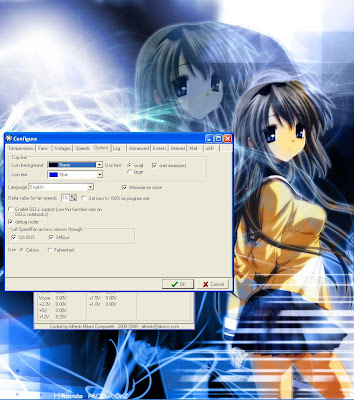
Since we're making it start on startup, it would be nice to start SpeedFan minimized so that it does not pop up and bug you. It is also nice to minimize on close since it's human nature to click close and for the case of SpeedFan, it really will close if the minimize on close option isn't checked.
Delta value for fan speeds - this allows how precise you can set your fan speed and also affects how fast the fan speed changes automatically. Lower values means a slower change.
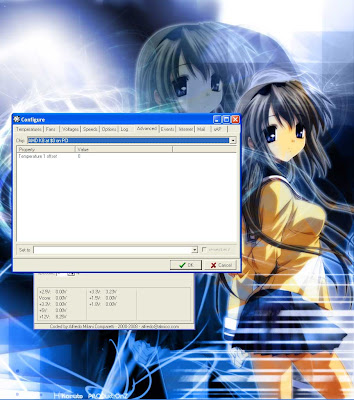
This Advanced tab is interesting, as advanced settings usually are. You can select the monitoring chip and change it's settings. In this case I'm showing my CPU, which gives the Core reading. Are we seeing something something interesting here? Temperature offset! Good for calibrating the sensor so that the temperature is accurate.
Update 14/08/2011 -
I noticed on this mobo that the PWM mode is defaulted to SmartGuardian, which when selected will not follow SpeedFan's settings. Software controlled needs to be selected.
Now, some explanations on the terms/logos:
Flame on the temperature means too hot (above warning), and all fans will be set to 100%
Red on the temperature means getting hot or a temperature increase. Affected fans will be set to maximum value
A green tick means temperatures are ok and stablized. Fan speeds will be minimum if this temperature is around or below desired temperature
A blue tick means temperatures are way below desired or decreasing. No problem here. Fan speeds will be at minimum
Core usually means the reading from the sensor inside the CPU, which will give the same reading as CoreTemp or other such programs that read this temperature
Remote1 usually means mainboard CPU temperature sensor, while Remote2 is northbridge/ambient temperature, although sometimes their roles shuffle around. I even had a Remote3 as CPU before. To know which is the CPU, just do a Prime95 and see which rises.
HD0 = first HDD, HD1 = 2nd HDD etc. Tends to be accurate because HDD temperatures are taken from S.M.A.R.T. i.e. the sensor system on your HDDs, there's no chance for non-standardized mobos to screw things up.
Speed01 and Speed02 - while this depends on your mainboard and where you plugged the fans to, so far my experience is that Speed02 is usually the CPU fan while Speed01 is the system/power fan or no effect. Again, to know which is which, just test. *Hint - CPU fan is always the fastest (and noisiest)
There you go. Enjoy your automatic speed control. :)


1 comment:
Go to speedfan download that is where I found the original post it has a good link to the free download.
Post a Comment